eLearning at the CTL
Upcoming Events
All | Faculty | Grad Students
Contact
Centre for Teaching and Learning
Weldon Library (WL), Room 200
(519) 661-2111 x80346
ctl@uwo.ca
Using the Attendance Tool
Tracking Attendance
Follow these steps to track attendance:
1. Log into your course, choose Manage Course from the navigation menu and select Course Admin.
The Attendance tool is under Learner Management.
![]()
2. Click on Attendance; then select Attendance Schemes.
![]()
3. There is one default scheme already set up in the system. Select the down arrow left of the default scheme and choose View a New Window, you can get a peek at that.
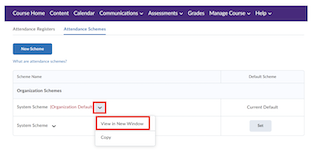
You will notice that for this attendance scheme, there are two options, present and absent. If a student is present, they get 100%, if they are absent, they get 0%.
![]()
You are free to use the organizational default and stop here or you can create your own new scheme by continuing the instructions below.
4. To create a new scheme, select New Scheme and name your scheme.
![]()
5. Fill in the details for a New Scheme of your choice. For example, the screenshot below is of a New Scheme named “Sample Scheme”. It also shows Attendance Statuses for this scheme. Choose Save, after you finished setting up your scheme. Then, select Close.
![]()
6. The Sample Scheme is now added to organizational schemes. Click Set to make it the current Default scheme.
![]()
7. Now select the Attendance Registers tab to create a registry for attendance. Select New Register.
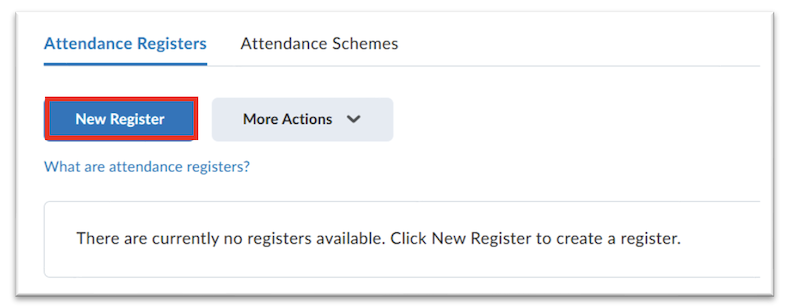
8. Name your Attendance Register (e.g., you can name it the course title or number, etc.). You can add a description, if you like. The Attendance Scheme will default to the scheme you set as the default scheme.
![]()
9. To be notified if students fall below a certain percentage attendance (e.g., 50%), fill in the Cause for Concern (%) field. Choose whether students can see the register and select who (what users) to include (i.e., all or specific groups or sections).
![]()
10. To set up sessions in which you want to track attendance scroll down the screen and add the sessions in the list provided. When done, click Save followed by Close.
![]()
11. Now to track attendance, select your Register and you will see the names of the students in your course and your tracked sessions listed with totals for Present, Late and Absent as well as % attendance.
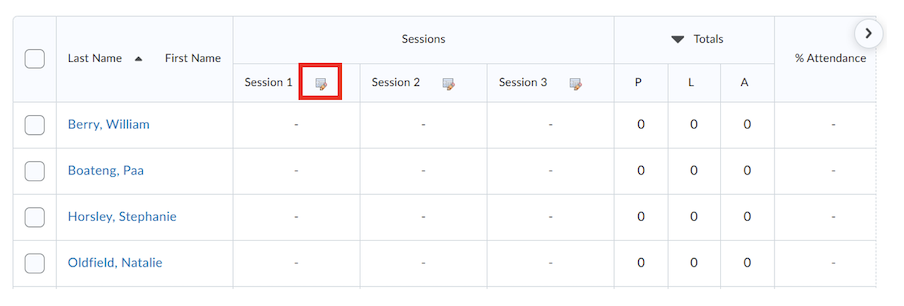
12. When you are ready to track a session (e.g., session 1), select the Enter attendance data icon for that session (highlighted on the image above), and select P L or A to mark the student as present, late, or absent.
![]()
13. If you have a large class, you can select the Set Status for All Users button on top of the listing and set the status for everyone.
![]()
It's important to note that the attendance tracker does not speak to the grade book, so if you want grades associated with attendance, you will need to create a column in the grade book to record attendance grades.