eLearning at the CTL
Upcoming Events
All | Faculty | Grad Students
Contact
Centre for Teaching and Learning
Weldon Library (WL), Room 200
(519) 661-2111 x80346
ctl@uwo.ca
Using the Awards Tool
How to Use the Awards Tool in Brightspace
The Awards tool allows you to recognize and reward your students’ accomplishments by issuing badges and/or certificates as awards for accomplishments.
Create an Award
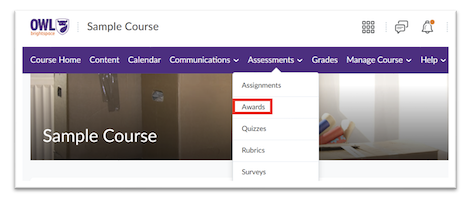
1. After logging into Brightspace and selecting your course, go to the navigation bar at the top, select Assessments, and then choose Awards from the drop-down menu.
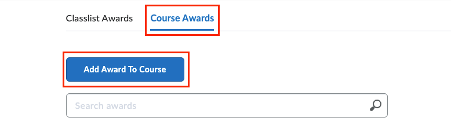
2. To create a new award, select Course Awards from the top and then click Add Awards to Course.
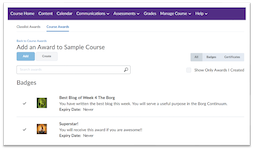
Note: You may see a list of existing certificates and badges. These are certificates and awards that others in Western have opted to share with you. You can add them by selecting the Add button beneath the award you want to add to your course OR select Create to create a new award.
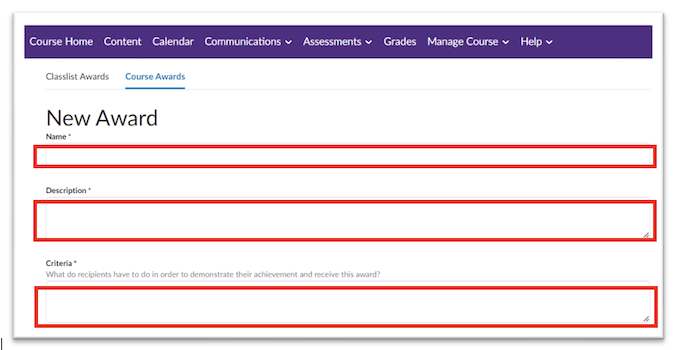
3. Name your award and add a Description and Criteria.
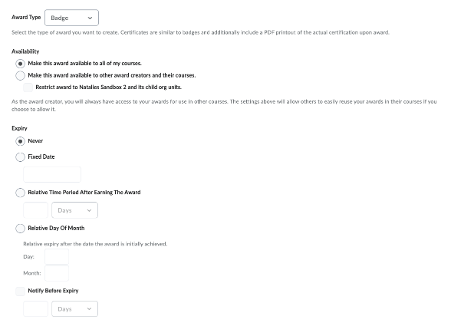
4. Choose the type of award students will receive: a badge or a certificate
a. Badges are typically used for smaller accomplishments in your course, like completing an individual module or scoring over a certain percentage on a quiz.
b. Certificates are typically used to indicate an award at the end of a program but can be used throughout. Students can download and print a PDF certificate.
5. Decide on availability of the award. Would you like the award to be available to this course only or to other award creators at Western? Then, decide if you want this award to expire, and if so, when.
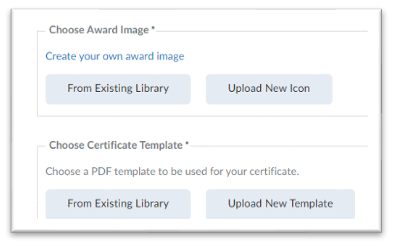
6. Choose Award Image – i.e., what do you want your award to look like. You can choose from the existing library or upload a new icon; Also – choose a PDF template to be used for your certificate.
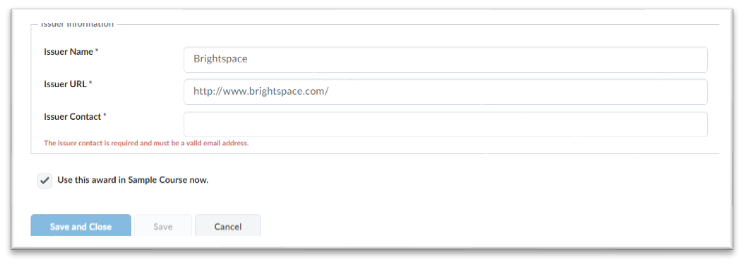
7. Next, fill out the issuer information. The system defaults to Brightspace as the issuer name. You can change that to your name if you wish. Issuer URL is Brightspace and then the issuer contact does need to include a valid e-mail address. Type in your e-mail address and then choose Save and Close at the bottom..
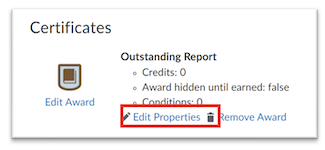
8. Our award is now created, but we do need to define the criteria for earning the award. To do so, select edit properties:
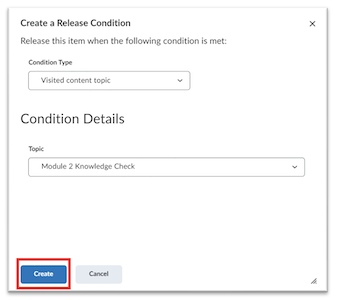
9. Select Create under “Release Conditions” and create the task(s) students will need to complete to earn this award. For example: “Visited Content topic”.
10. Once you have created your condition, choose Create at the bottom of the page.
11. You can continue adding conditions required for students to achieve the award. Then choose Save.
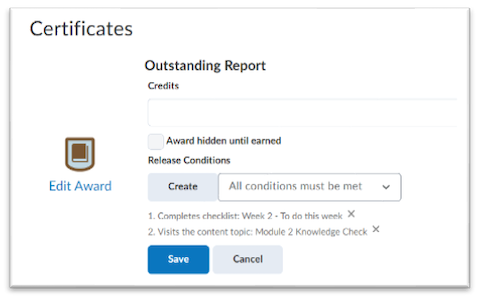
Now the certificate is created and set up and students who meet the conditions you set will achieve this award.
Manually Issue an Award
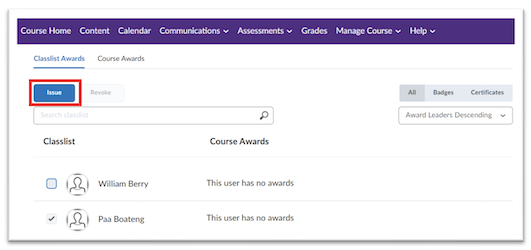
The other option you have on the dashboard is Classlist Awards. Here you can track which students have earned awards and you can also manually issue awards.
1. To manually issue an award to a student, select the box beside the student’s name and choose Issue.
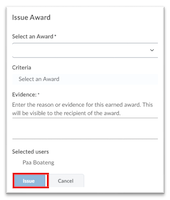
2. On the pop-up screen, select the award you want to issue from the dropdown menu, enter the Evidence for this earned award in the space provided, and then click on Issue at the bottom of the screen.
3. If you accidentally issue an award to a student that did not deserve it, make sure you've selected the name of the student and choose Revoke.